Posted on March 22 2023

Sew Along With Claire | Cordelia Sewing Pattern
The Cordelia dress is quite a simple sew in many ways, and once you have made one, they come together very quickly. The bit that takes time is the twist in the front, it's worth taking your time matching up the balance marks and getting the gathers to sit nicely. I had to re- sew it as I wasn't happy with my first attempt!
Fabrics Used To Sew The Cordelia Dress
We used a good quality medium weight cotton jersey which contains 5% elastane. The elastane content really helps the fabric return to its original shape, so bear this in mind when choosing your fabric. Working with a stable jersey like the one we’ve used on this dress is a joy to sew.

Cutting The Fabric For The Cordelia Dress
When cutting jersey fabric some people like to use a rotary cutter, I personally do not, I just use good quality pins and dressmaking shears and try not to lift the fabric too much. In fact, the best tip I can give you is to treat jersey fabric with delicate handling. Lightly press the fabric if it has creases, but try not to push and pull it about too much. I also find I can cut closer to the pattern if I cut clockwise around the pattern, (anti-clockwise is often easier if you are left handed), especially around tighter curves.
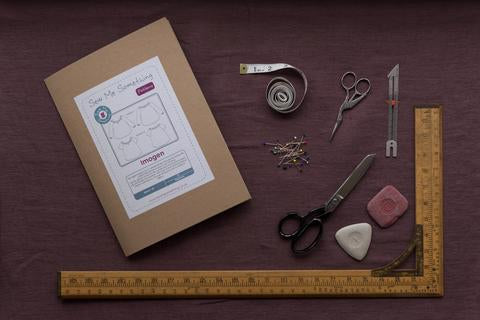
Transferring The Dress Markings
Transfer all the markings/balance marks from the pattern to the fabric carefully, using a fabric marker or chalk pencil. It's useful for this pattern to transfer the markings to both the wrong and right side of the fabric. I use the Prym Cartridge Pencils because I can get a precise mark. Be sure to draw the correct symbol marking ie: circle, triangle, square as this will help when matching them up later on.
To Shop The Chalk Pencil I Used, Click Here

Overlocking The Cordelia Dress
I used an overlocker to sew most of the seams, but you will need a sewing machine for the rest of the seams. You will also need a ballpoint or jersey needle.
Make sure to use an elongated zig zag stitch or stretch stitch on your sewing machine.
Click Here To Shop The Jersey Needles I Used

If you want to achieve a double row of topstitching to mimic a coverstitch finish on the hems and around the back neck, you will also need a twin stretch jersey needle. Make sure you use a good quality twin needle and use a longer stitch length and practice first on a test piece. I like the Schmetz or Prym stretch twin needle with a wider gap between the needles (4mm or 6mm).
The Needles I Used On My Sewing Machine

Here's a photo of the twin needle on the back neck

Check your overlocker settings and practice using a scrap of your fabric to get the correct stitch tension. Try sewing on a single layer and a double layer to see how the fabric behaves, you may need to adjust the settings differently. All I needed to do was tweak the differential feed to 1.25 for this easy to sew jersey. All other settings are standard.
Neatening The Back Neck Of The Cordelia Dress
One other important element to sewing the Cordelia is to make sure you support the dress in certain areas to prevent or to allow the fabric to stretch. When neatening the back neck we recommend using a bias tape along the edge to help prevent the back neck from stretching.
The Bias Tape I Used When Neatening The Back Neck Of The Cordelia

Cut the tape a little longer than the neck edge, place it a couple of millimetres away from the raw edge and use a cool iron to set the tape. When you start overlocking you can insert the tape under the presser foot, so it starts stitching and is secure before the blade starts to cut the fabric.
Another place to use the bias tape is to place it along the front facing - from the top edge to the small triangle mark. This helps prevent the neatened edge from rolling and the facing to lie flatter. You could also try using the tape on the inside, along the fold line of the facing. I didn't need to with this jersey as it sat well without it.

Supporting The Shoulder Seams
You will need to support the shoulder seams so you can use the same bias tape here too.
Another product we use to help support the back waist seam is clear elastic or Framilastic. This really helps to allow the fabric to return to its shape after stretching, as the back seam will be stretched when getting the garment on and off.
Click Here To See The Elastic I Used
![]()

Making The Front Twist
Before you make the twist in the front, lay the dress front out in front of you, right side facing up. With an erasable fabric pen, draw a straight line from the square mark on the centre front to between the two circles at the point of the waist seam.
Here’s The Fabric Marker I Used

This line really helped me when arranging the gathers to sit along the waistline.

Then make the full twist with the upper part of the dress and match the balance marks - circle to circle and square to square. It helps if you have marked both the right and wrong sides of the fabric. Make sure you find the circle on the CF facing and match that to your circles too. Arrange the gathers as best you can making sure your drawn line lines up along the waist line, and sew from the side seam towards the circle. You will sew over some of the gathers but some of the gathers will be in the centre where there will be a gap. Some people tend to push all the gathers into the gap but they should be spaced evenly along the waist. You can even cross the front over more by moving the facing edges towards the side seams if you want to cover more of your bust.

Sewing The Shoulder Seams Of The Cordelia Dress
When sewing the shoulder seams leave a longer tail end of overlocking threads, it will make it easier when tucking them in to neaten the shoulder point. You can always trim the excess off after. You will need to use your sewing machine to sew a small row of stitches to keep the seam allowance flat. Remember to increase the stitch length to accommodate the layers of fabric you are sewing through.

As always, giving everything a light press after each time you sew gives a more professional finish. I hope you give the Cordelia a go, with a few tips and tricks under your belt it's a really quick make.
And there you have it. A fabulously gorgeous dress and more importantly, a fabulously easy make. Will you be making our Cordelia Dress? If you do, share your pics with us by tagging us on Instagram @sewmesomething and using the hashtags #cordeliadress #smspatterns
Need help with sewing jargon? No problem! Check out our A-Z Glossary Of Sewing Terms here.
As someone who enjoys sewing clothing patterns as a hobby, I’ve found the Cordelia dress to be a quick project. I totally agree with you, making the front requires more attention and time. I had a fun time doing this and I can’t thank you enough for recommending to use a medium weight cotton jersey for this one, thanks Claire!